Drupal User Guide
Edit Existing Page
To edit existing content, log in and then bring up the page you wish to edit. This page looks exactly like your published webpage, except for the View/Edit tabs top left-hand side and the black admin menu bar at the top banner.

Select the Edit tab and make your updates. Once edits have been made, save changes by hitting the Save button at the bottom of page. Changes will be published in a few minutes.
Editing Tools
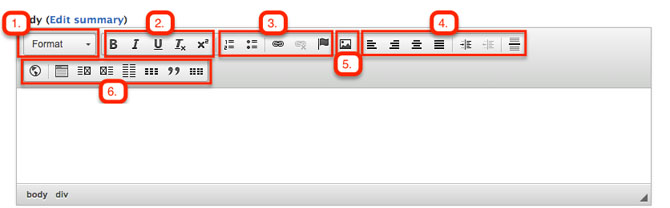
- Format - Mostly used for Heading 1-4 styling for section titles, and normal paragraphs.
- (B) Bold, (I) Italic, (U) Underline, (Tx) Remove Format, Subscriptx2
- Numbers List, Bulleted List, Insert/Remove Link, Anchor Link
- Align Left, Align Right, Center, Justify, Increase/Decrease Indent, Horizontal Line
- Insert Image
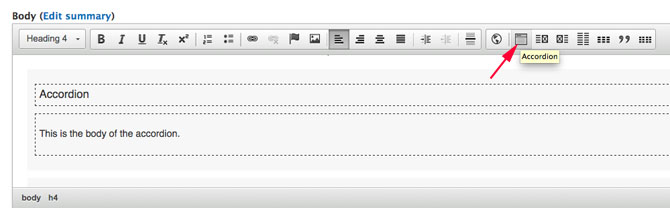
- Page styling - iFrame (embed video), Accordion, 2-column with right image, 2-column with left image, 2-column, 3-column, Quote
See Style Guide.
Add Links
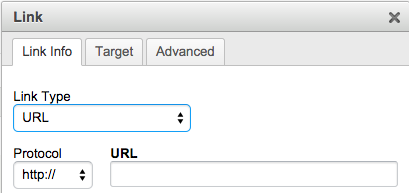
Highlight the desired word or phrase to be linked, then select the link icon in the tool bar.
![]()
Internal Path
Create links to another page on the website. Select Internal path, then type in the title of the page you want to link to. Options for title of the page will automatically populate that you can choose from. For example if you want to create a link to the Parnassus locations page, start typing in the title, then the drop-down menu for Parnassus related name comes up for you to choose from. There is a "node" name in parenthesis that follows the title, like (node/201), that just indicates the drupal ID for that page, so don't be alarmed by it.

URL link to external page
Create links to external page or other website that is not within radiology.ucsf.edu. Target (New WIndow _blank).
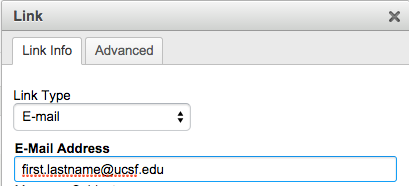
Create links to email address ([email protected]).
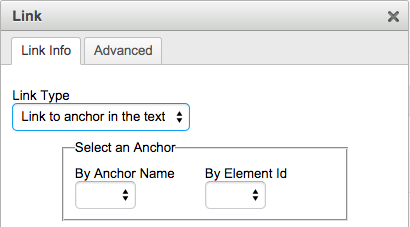
Anchor Link
To link to an area or "anchor" within the same page, select Link to anchor in text. Note: an anchor tag must be created first.
See Style Guide for types of link style guide.
Add Images
To upload an image (.jpg, .png, or .gif files), select the image icon.
![]()
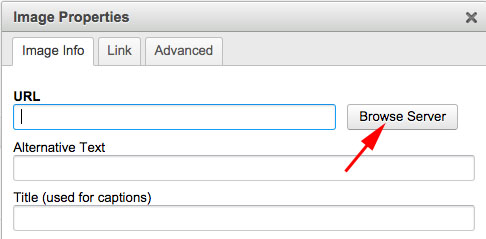
The Image Properties window opens. Select the Browse Server button to find the folder you would like to upload your image to.
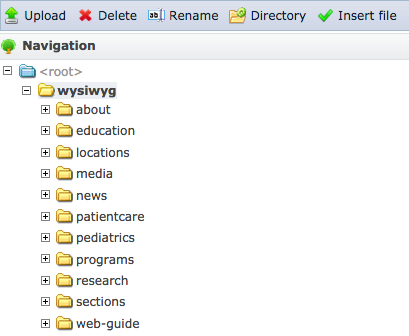
The File Browser window opens. Select the appropriate folder to upload your image. For example, if you want to upload an image for the Musculoskeletal section, select the sections folder, and find the musculoskeletal folder. For research labs, select the research folder and find your lab folder.
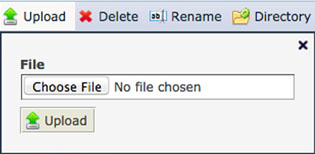
To upload an image (.jpg, .png, or .gif files) from your computer, select the Upload tab, then Choose File to find your image file on your computer and Open. Then press the Upload button. Once uploaded to the appropriate folder, then press OK to insert the image.
Alternative Text (Alt tag): For accessibilty and SEO, add a short, description of the image.
See Style Guide for compressing, aligning or resizing images, as well are recommended image size. Or contact webservices team for assistance [email protected].
Upload Word, Excel, PDF or PPT
To upload documents (Word, Excel, PDF or PowerPoint files), highlight the desired word or phrase to be linked. For example, (pdf), (xls), (doc) or (ppt). Then select the link icon.
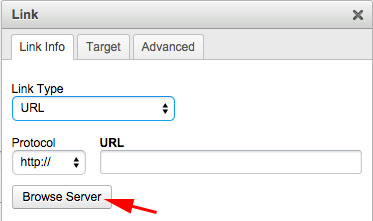
![]()
From the Link window, select URL Link Type, and then press the Browse Server button to find the folder you would like to upload your document to.
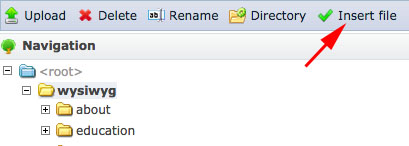
The File Browser window opens. Select the appropriate folder to upload your document. For example, if you want to upload a document for the Musculoskeletal section, select the sections folder, and find the musculoskeletal folder. For research labs, select the research folder and find your lab folder.
To upload a document (doc, xls, pdf or ppt files) from your computer, select the Upload tab, then Choose File to find your image file on your computer and Open. Then press the Upload button.
Once uploaded to the appropriate folder, select the document and press Insert file, then press OK.
See Style Guide for examples to how the documents links should look like. Or contact webservices team for assistance [email protected].